
How to free up storage space on your Mac
If your Mac has been feeling slow lately… or you’ve seen that dreaded “Storage Almost Full” message pop up, it might be time for a little digital decluttering.
The good news? Freeing up space on your Mac doesn’t have to be complicated. With a few simple steps, you can create more room, improve performance, and make your device feel like new again.
Let’s walk through it together.
Why Storage Space Matters
When your Mac runs low on storage, it can:
Slow down performance
Prevent updates from installing
Make saving files or photos difficult
Think of it like a cluttered room… when there’s too much “stuff,” it’s harder to function.
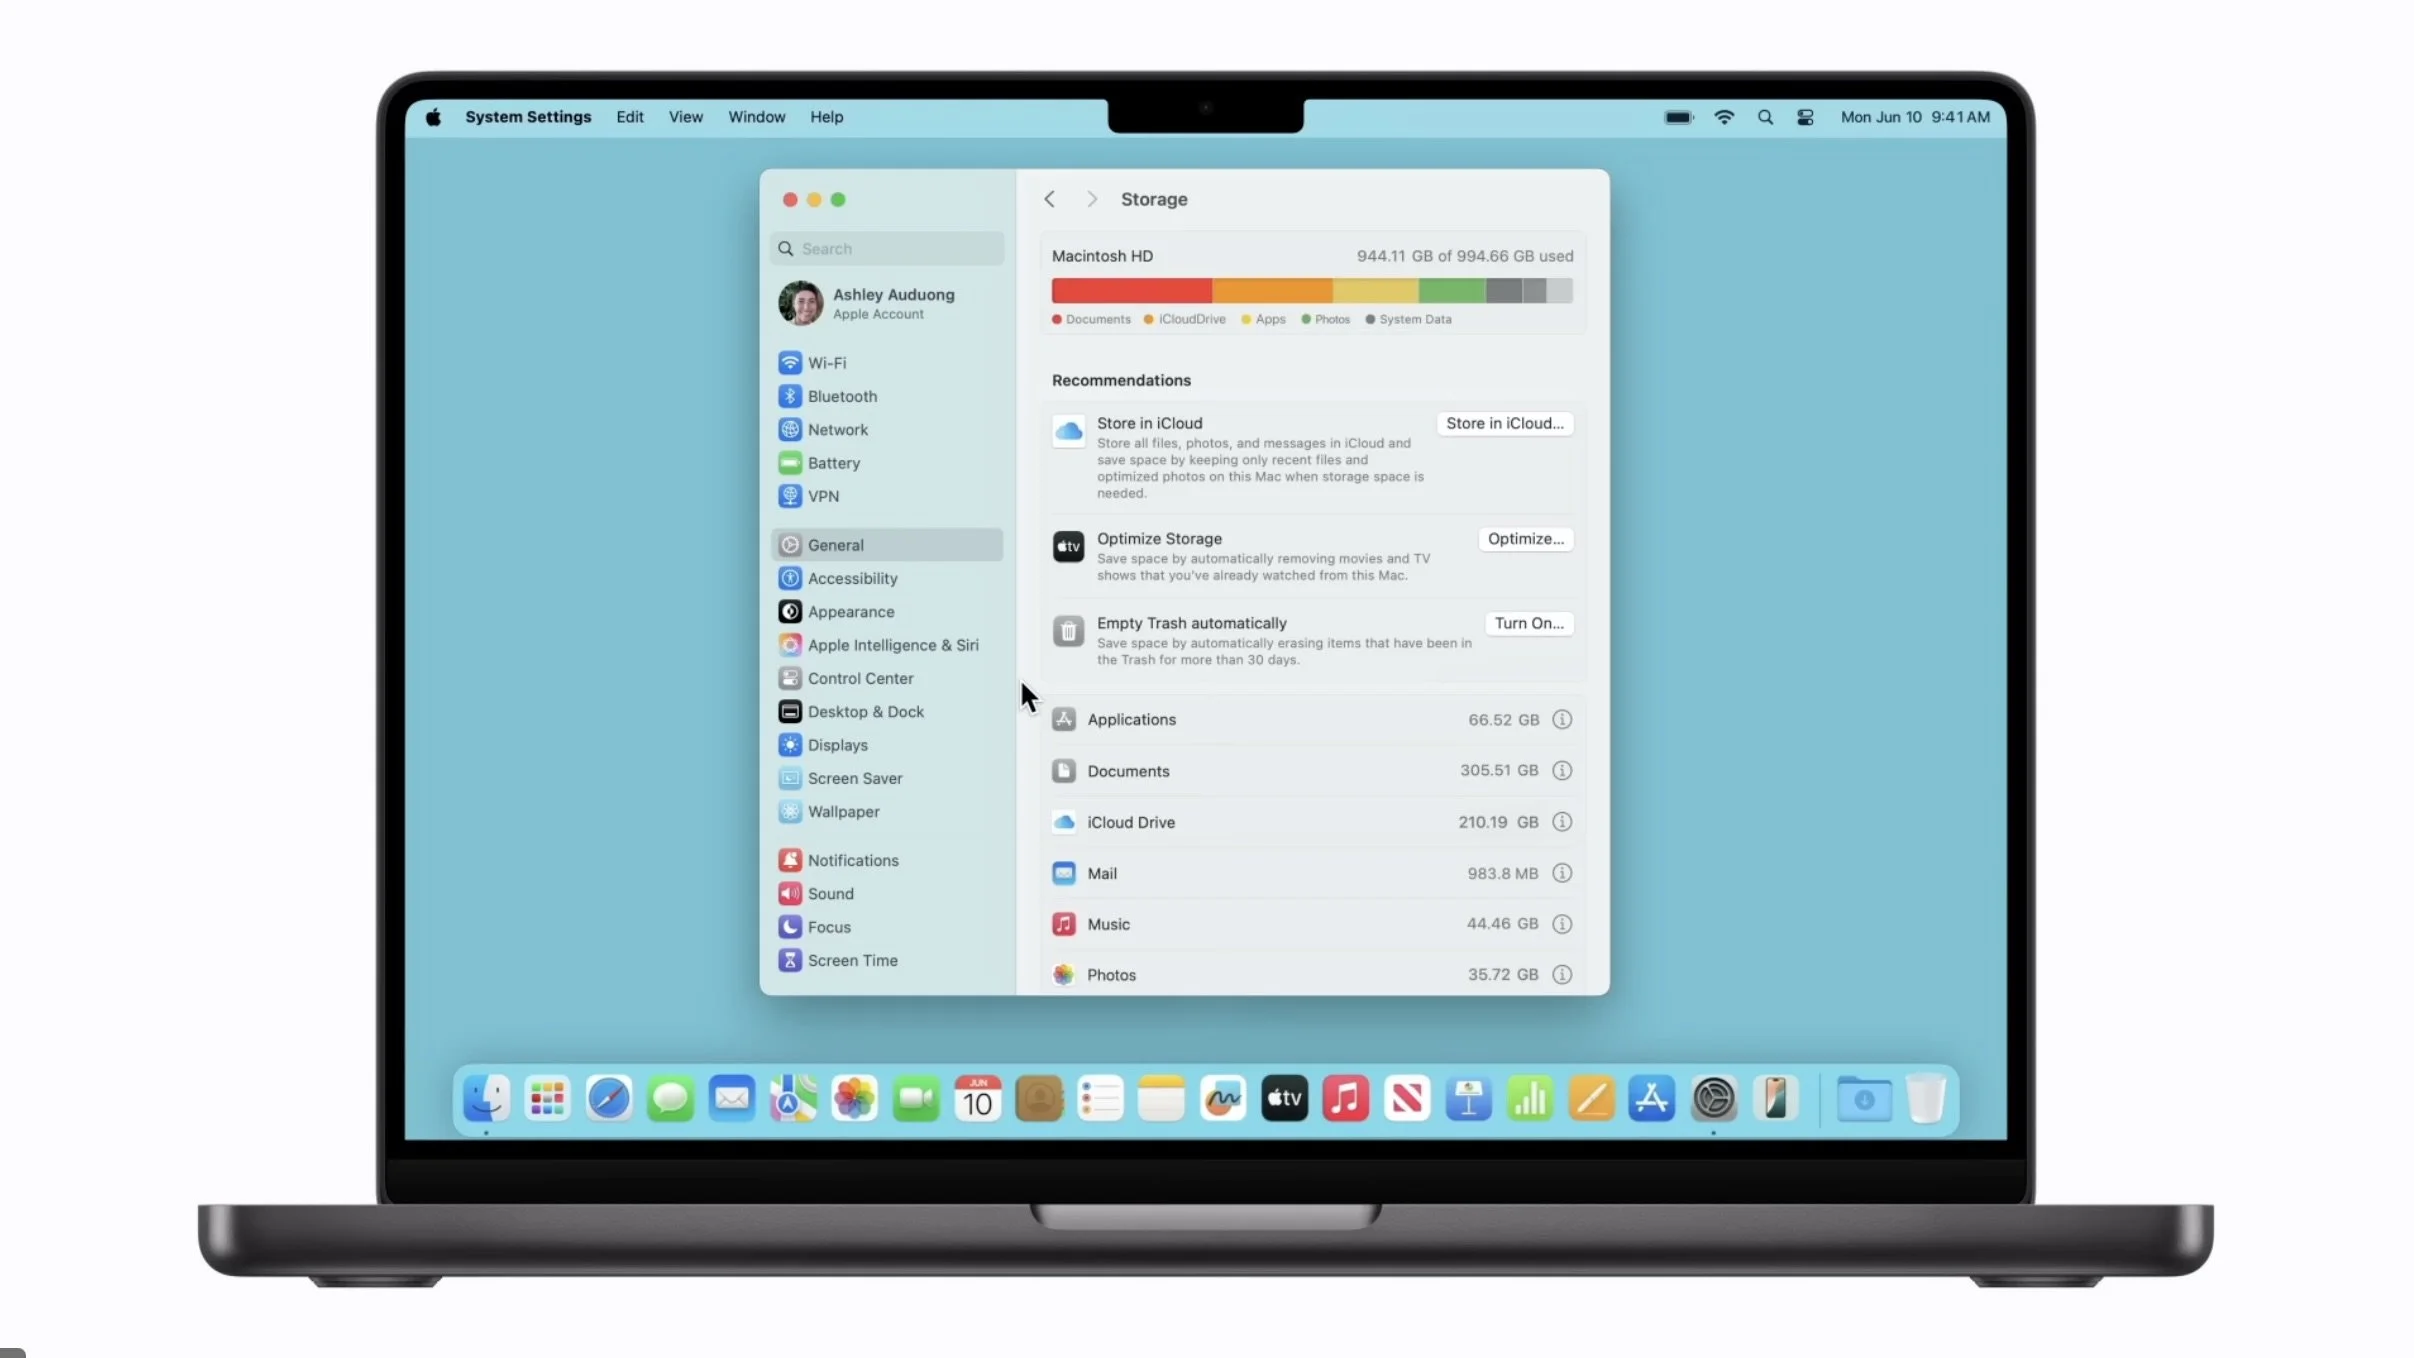
Step 1: Check What’s Taking Up Space
Start by seeing where your storage is going:
Click the Apple icon (top left corner)
Select System Settings (or “About This Mac” on older versions)
Go to General → Storage
Here, you’ll see a breakdown of what’s using space like Apps, Documents, Photos, and System Data.
Step 2: Use Built-In Storage Recommendations
Your Mac actually gives you helpful suggestions! Look for options like:
Store in iCloud – Moves files, photos, and messages to the cloud
Optimize Storage – Removes watched movies/TV shows automatically
Empty Trash Automatically – Deletes files in Trash after 30 days
Reduce Clutter – Helps you review large or unused files
These are great “set it and forget it” options.
Step 3: Delete Unused Apps
We all have apps we downloaded once… and never used again.
To remove them:
Open Finder
Click Applications
Drag unused apps to the Trash
Tip: If you don’t recognize an app, it’s worth checking before deleting, but chances are, you don’t need it.
Step 4: Clean Up Large Files
Some files take up way more space than you think, especially videos and downloads.
To find them:
Go to Storage → Documents → Large Files
Sort by size
Delete anything you no longer need
Focus on:
Old downloads
Duplicate files
Outdated documents
Step 5: Empty Your Trash
This step is simple—but often forgotten!
Right-click the Trash icon
Click Empty Trash
Files in the Trash still take up space until they’re permanently deleted.
Step 6: Manage Photos and Videos
Photos and videos are often the biggest storage users.
Options:
Delete blurry or duplicate photos
Move older photos to an external hard drive
Use cloud storage (like iCloud)
Even removing a few large videos can free up gigabytes of space.
Step 7: Clear Downloads and Browser Files
Your Downloads folder can quietly fill up over time.
Check for:
Old PDFs
Duplicate images
Install files you no longer need
You can also clear browser cache (Safari, Chrome, etc.) to free up additional space.
A Final Thought
Taking a little time to organize your Mac can make a big difference in how it performs and how you feel using it.
And if this ever feels overwhelming, you’re not alone.
Need a Helping Hand?
At Silver Wizard, we’re here to help you feel confident and in control of your technology.
Whether it’s cleaning up your computer, learning new tools, or solving everyday tech challenges… we’ve got you covered.